Step 1: Insert the Ubuntu CD and boot from it


Step 2: Select the language and click "Install Ubuntu". If you chose "Try Ubuntu" the OS will temporarily be installed in RAM. If we think out of the box, this option is very useful if we want to retrieve some files in case of system crash. For example, the Windows crashes and would not allow us to log in (neither normal nor safe mode) to the system. In this case, I can install Ubuntu as "Try Ubuntu" and safe all my files on an external hard disk.

Step 3: Choose the desired options and click "Forward". You may either choose to install the update during the installation or install manually after the installation has finished. I recommend installing the "third-party software" as it will install some basic and required applications/drivers automatically.

Step 4: Select "Specify partitions manually (advanced)" and click "Forward"

Step 5: I have only one hard disk connected with out any partition. I select the hard disk and click "New Partition Table". When a warning message is received click "Continue". In the next image a new partition is created having the maximum hard disk capacity.


Step 6: Select the "free space" partition and click "Add". On the pop up screen create a "Primary" partition of 100 MB with "ext4" file system and mount it as "/boot". Click "OK" once done.

Step 7: Select the "free space" partition again and click "Add". On the pop up screen create a "Primary" partition of twice the size of RAM installed as "swap area". If you have read the previous post you must be knowing that the swap area is used as RAM.

Step 8: Select the "free space" partition again and click "Add". On the pop up screen create new partition utilizing the complete free space available with "ext4" file system and mount it to "/". Click "OK" and then "Install Now" to start the installation process


Step 9: Select the time zone and click "Forward"

Step 10: Select the keyboard layout and click "Forward"

Step 11: Enter the details and click "Forward".


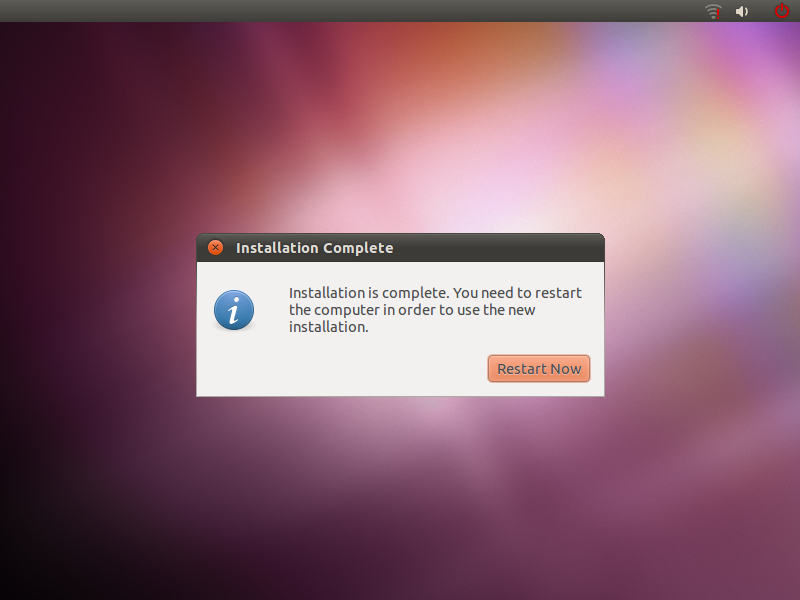
Step 12: Click "Restart Now" to finish the installation
Once the computer has rebooted, select the user name and log in to the Ubuntu system.


No comments:
Post a Comment